
5.01.2 Troubleshoot common Windows OS problems Part 2
Introduction
In this lesson, we’re going to dive into troubleshooting common computer issues, much like solving a puzzle with multiple pieces that don’t quite fit. We’ll start by addressing boot problems—whether it's a failure to boot, an invalid boot disk, or a black screen—using recovery tools and BIOS settings to restore your system’s functionality. Next, we’ll tackle profile issues, like slow startup or desktop loading, caused by corrupt profiles or slow drivers. We’ll explore ways to improve system performance by identifying resource bottlenecks and handling unresponsive services. We’ll also cover troubleshooting system faults such as the dreaded Blue Screen of Death, overheating, and USB problems. Finally, we’ll wrap up solutions for application crashes and service failures, all with the help of essential diagnostic tools. By the end of this lesson, you’ll be equipped to fix a wide range of system errors and get your computer running smoothly again.

Troubleshooting Boot Issues
When a computer fails to boot, the goal is to determine where the failure occurs and identify which file may be missing or corrupted. Once identified, the missing or corrupt file can be replaced using recovery tools or system commands. Here are common boot problems and troubleshooting steps to fix them.
1. Failure to Boot/Invalid Boot Disk
Problem: The system shows error messages like "No boot device found" or "Invalid boot disk."
Common Causes:
Previously, it could be caused by leaving a floppy disk in the drive during restart.
Today, it could be the system firmware set to boot from USB or another removable device.
Faulty hard disk or SSD connections.
A hard disk that is failing or undetectable by the system firmware.
Steps to Fix:
Remove any removable disks (e.g., USB drives or CDs).
Check the boot order in the BIOS/UEFI settings to ensure the hard disk is the primary boot device.
If the error occurs intermittently, check the hard disk for signs of failure.
For older systems, confirm that the drive is correctly detected by the system firmware.
2. No Operating System Found
Problem: A message saying "No OS found" appears, indicating the boot device can't locate the operating system.
Common Causes:
Faulty or damaged hard disk.
Corrupt or missing OS loader.
Steps to Fix:
Run disk diagnostics if available.
Use a recovery option to run the chkdsk command to check for errors.
Enter system setup (BIOS/UEFI) and adjust or reset settings.
If the system detects the disk but still fails to boot, run Startup Repair and open a command prompt for manual repair.
Bootrec Commands:
bootrec /fixmbr: Repairs the Master Boot Record (MBR). Do not use if the drive uses GPT partitioning.
bootrec /fixboot: Repairs the boot sector.
bootrec /rebuildbcd: Adds missing Windows installations to the Boot Configuration Data (BCD).
Additional Tip: Use diskpart to confirm the system partition is marked as active and ensure no other partitions are set as active.

3. Graphical Interface Fails to Load/Black Screen
Problem: Windows starts booting, but the sign-in screen or desktop doesn't appear, or the screen remains black after logon.
Common Causes:
Corrupt drivers or system files.
Misconfigured boot settings in msconfig.
During Windows updates, a black screen might appear, especially if the update is incomplete.
Steps to Fix:
If the system boots to Safe Mode, replace or update the graphics adapter driver.
If no GUI loads, consider using system recovery options to repair or restore Windows from a backup.
During updates, if the system shows a black screen, give it time to complete. Check for disk activity and spinning dots on the screen.
If the system remains unresponsive, try pressing START+CTRL+SHIFT+B to reinitialize the display.
Advanced Steps:
If the problem persists, run chkdsk and sfc to verify system file integrity.
Consider rolling back or updating the graphics driver.
Key Tools for Boot Troubleshooting
chkdsk: Checks and repairs disk errors.
bootrec: Repairs boot records and the boot sector.
diskpart: Manages partitions and ensures the correct partition is active.
sfc: System File Checker to repair missing or corrupted system files.
By following these steps, you can troubleshoot and resolve many boot-related issues, ensuring your computer can restart properly.
Troubleshooting Profile Issues
If Windows boots up but does so slowly, there may be issues with loading drivers, services, or even user profiles. Here’s how you can troubleshoot and fix common problems causing slow startups or profile loading issues.
1. Identifying Startup Delays
Problem: Windows boots slowly before the sign-in screen appears.
Common Causes:
Slow loading of drivers and services.
Network service or configuration issues.
Possible file corruption affecting startup.
Steps to Fix:
Enable verbose status messages to see detailed information during the boot process.
This can be done by configuring a system policy or modifying a registry setting to enable "Display highly detailed status messages."
Check the status of network services and drivers to ensure they are loading properly.
2. Slow Desktop Loading After Sign-In
Problem: The desktop is slow to load after signing in, possibly due to a corrupt user profile.
Common Causes: A corrupt user profile, especially the NTUSER.DAT file, which stores important registry settings for the user.
Steps to Fix:
Rebuild the local user profile by creating a new user account.
Copy necessary files from the old, corrupt profile to the new one, but exclude the following files:
NTUSER.DAT: This is the file most prone to corruption.
NTUSER.DAT.LOG
NTUSER.INI
By transferring only the necessary files, you avoid copying corrupted settings that could continue to cause slow performance.
Key Points to Remember:
Use verbose status messages to identify delays during boot.
Check for network service or file corruption issues causing slow startup.
If the user profile is corrupt, create a new profile and carefully transfer files, avoiding potentially corrupted files like NTUSER.DAT.
These steps will help you troubleshoot and resolve slow loading profiles, ensuring a smoother startup experience for your Windows system.

Troubleshooting Performance Issues
Sluggish performance can have various causes. Use the following procedure to identify and fix performance problems, focusing on system resources, specific processes, and potential hardware or software issues.
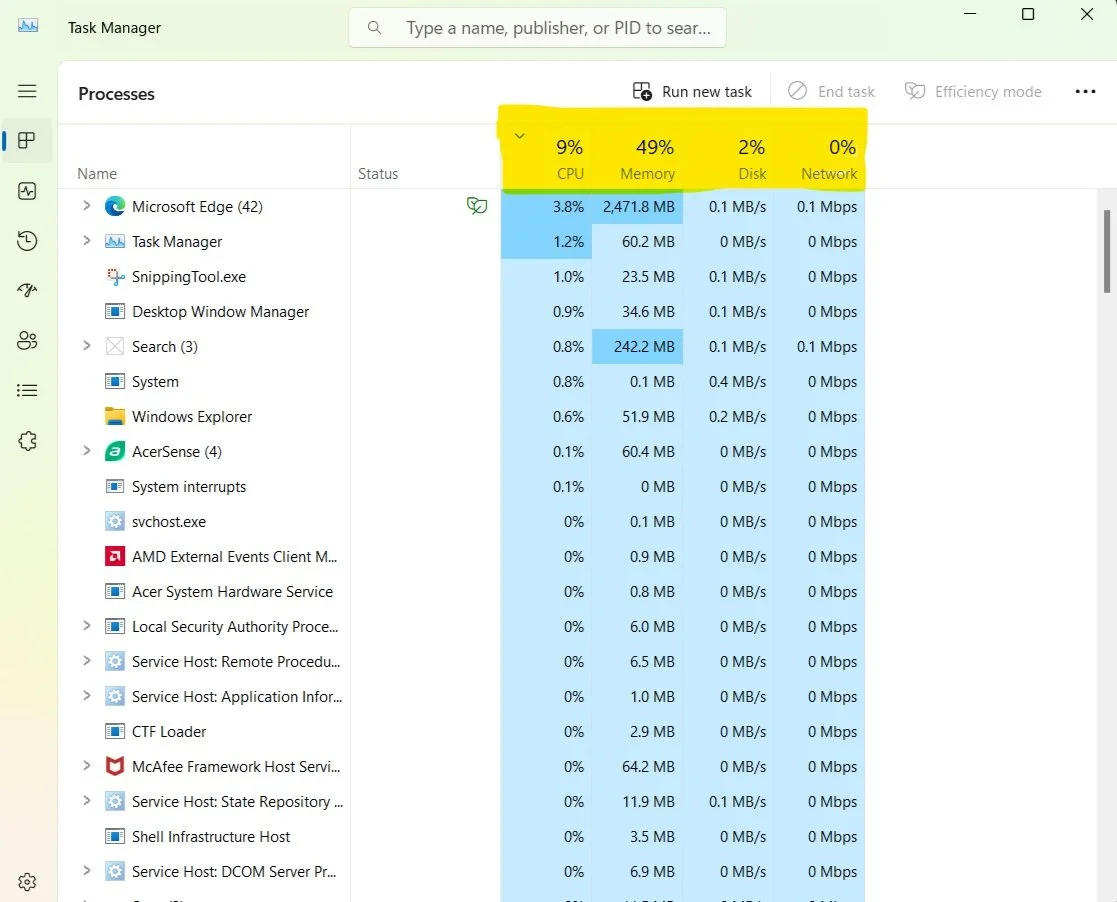
1. Identify Resource Bottlenecks
Use Task Manager to check system resource utilization:
Look for CPU, memory, or disk usage at 90–100%.
Identify which process is using the most resources. This might be:
svchost.exe (manages multiple Windows services).
Common culprits include Windows Update, SuperFetch, Windows Telemetry, Search/Indexing, and Windows Defender or other security software.
Action:
Let the process complete if it seems to be working normally but slowly.
If disk activity stays at 100% or if the process seems to have stalled, consider restarting the process or service.
If restarting the process doesn’t help, try rebooting the computer.
2. Restart or Power Cycle the System
If system performance doesn't improve after restarting processes:
Reboot the computer. If the issue persists, consider fully powering down the machine by:
Shutting down the system.
Disconnecting the power supply for 30 seconds.
Restarting the computer to clear caches and system memory.
3. Isolate the Problematic Service
If the same process or service becomes unresponsive repeatedly:
Disable the service (if possible) and check with the software vendor for known problems.
If Windows displays a Low memory error:
Try running fewer programs or isolating the problematic process. A memory leak might be the issue, which requires a fix from the vendor.
Add more RAM if the problem is caused by trying to run too many programs at once.
If Windows shows a Low disk space error:
Use Disk Clean-up to remove unnecessary files.
Check for unusual application behavior, such as excessive logging or temporary file creation.
If space continues to run out, more storage may be needed.

4. Additional Troubleshooting Techniques
If you cannot pinpoint the cause using Task Manager, try these solutions:
Apply updates:
Check for missing Windows and application updates.
Install the latest drivers for your hardware.
Defragment the hard drive:
For HDDs, run defrag to improve file I/O by consolidating fragmented files.
Ensure there is sufficient free disk space.
Check hardware requirements:
Use Task Manager, Resource Monitor, or Performance Monitor to check for resource strain (CPU, memory, disk, or network).
Consider upgrading to an SSD if the system performance is poor on an HDD.
Disable unnecessary startup items:
Use msconfig or Task Manager to disable services or programs that are not essential at startup.
Set less important services to delayed startup or manual startup.
Scan for malware:
Check for viruses and malware, but also verify your antivirus configuration:
Antivirus scanning can reduce system performance.
Temporarily disable scanning to check for performance improvements.
Ensure system files are excluded from scans and follow vendor recommendations for exceptions (e.g., database or virtual hard disk files).
Power management issues:
If the system is in power-saving mode (like CPU throttling), disable it.
Restart the computer if the user has been using sleep or hibernate modes.
Check for underlying causes like overheating, which can trigger power-saving measures.
Key Takeaways:
Use Task Manager to identify resource-heavy processes.
Restart or power cycle the system to clear memory and caches.
Check for updates, malware, and power settings to improve performance.
Upgrade hardware (RAM or storage) if system resources are constantly strained.
By following these steps, you can troubleshoot sluggish performance and optimize the system for better functionality.
Troubleshooting System Fault Issues
When dealing with system faults like the Blue Screen of Death (BSoD), system instability, or USB issues, it's essential to follow a structured approach to identify and fix the root cause. Below are the steps to troubleshoot these issues effectively.
1. Blue Screen of Death (BSoD)
A BSoD indicates a serious error that causes Windows to stop functioning. These errors often stem from hardware problems or faulty drivers.

Steps to troubleshoot BSoD:
Use System Restore or, if you can access Safe Mode, try driver rollback or update rollback to restore the system to a previous working state.
Remove recently added hardware or uninstall any newly installed software.
Check hardware connections to ensure all components are properly seated and all cables are secure.
Run hardware diagnostics, such as chkdsk for disk issues, and perform a malware scan.
Inspect fans and vents for dust buildup, as this can cause overheating. Clean them if necessary.
Note the STOP error code (e.g., Stop: 0x0...) and search the Microsoft Knowledge Base for known fixes.
Disabling automatic restarts: If the system restarts automatically and you can't read the error message, open Advanced Options and select Disable automatic restarts. You can also adjust this in Advanced System Properties > Startup and Recovery Settings.
2. System Instability and Frequent Shutdowns
If the system is unstable—freezing, shutting down, or rebooting unexpectedly—the problem might involve overheating, power issues, memory (RAM), or corrupted system files.
Steps to troubleshoot system instability:
Check for overheating: Ensure fans are working, vents are clear, and there is no dust buildup.
Run Windows Memory Diagnostics: This tool checks for memory errors. It can be accessed via Administrative Tools or the Recovery Environment. If errors are found, check that the memory modules are correctly seated.
Test individual memory modules: Remove all but one memory module and run the test again. This helps isolate faulty modules. If good memory shows errors, the issue may be with the motherboard.
Check for file corruption: Run chkdsk to verify the file system and sfc /verifyonly to scan system files. If errors are found, use chkdsk /f, chkdsk /r, or sfc /scannow to attempt repairs.
3. USB Issues
USB devices can cause issues, such as not working after connection or after resuming from sleep mode. They can also generate warning messages.
Steps to troubleshoot USB issues:
Update the USB driver: Check Windows Update or the manufacturer's website for the latest chipset or system drivers. There might be a specific USB 3 host controller driver.
Reinstall USB host controllers: Use Device Manager to uninstall each USB host controller, then reboot to reinstall them with updated drivers.
Disable USB selective suspend: If issues persist, disable USB selective suspend for specific ports, devices, or system-wide to prevent power management from interfering.

USB controller resource warnings: If too many devices are connected to a single controller, especially using an unpowered USB hub, this can cause resource issues.
Solutions:
Connect the hub to a USB 2 port instead of USB 3. Use USB 3 ports for devices like external disks or network adapters.
Reduce the number of devices connected to the hub. Test if one particular device is causing the issue.
Key Takeaways:
BSoD errors are often caused by hardware or driver issues and can be addressed by system rollback or removing faulty components.
System instability can indicate overheating, power issues, or memory problems, which can be checked with diagnostic tools.
USB problems may be resolved by updating drivers, reinstalling controllers, or adjusting power management settings.
By following these steps, you can methodically troubleshoot system fault issues and restore system stability.
Troubleshoot Application and Service Fault Issues
When dealing with issues isolated to specific applications or background services, it's essential to follow these structured troubleshooting steps to address and resolve the problems effectively.
1. Applications Crashing
When an application crashes, the immediate priority is to preserve any data that was being worked on. Here are key steps to manage and troubleshoot application crashes:
Steps to troubleshoot crashing applications:
Data preservation: Train users to save regularly, but modern applications like Microsoft Office often have built-in autosave features, reducing the risk of data loss. Also, enabling Windows File History or OneDrive can act as a continuous backup for file versions.
Give the process time: Sometimes, a process may become temporarily unresponsive but will recover. If it doesn’t, try to recover data from temporary files or folders before ending the task.
End the task: Use Task Manager to end the process once data recovery is complete. If the app crashes frequently, check the event logs for clues about the issue.
Check for file-specific issues: Determine if the problem occurs only with certain files. If so, the issue may be tied to a corrupted or incompatible data file.
Update the application: Check for any updates using the Help menu within the application. Application updates are independent of Windows Update, so it’s important to manage them separately.
Uninstall and reinstall: If updating doesn’t work, try uninstalling and reinstalling the application. If available, a repair installation can be another option.
Manual uninstall: If the issue persists after reinstalling, some registry entries or files may not have been fully removed. Follow the vendor’s manual uninstall instructions to ensure a clean reinstallation.
2. Services Not Starting
When you encounter errors related to services not starting, such as a message stating "One or more services failed to start," troubleshooting may involve investigating dependencies, permissions, or corrupted files.
Steps to troubleshoot service issues:
Manually start or restart the service: Services can sometimes get "stuck" during startup. Use the Services snap-in to start or restart the service manually.
Set to delayed start: If the service is not critical, consider setting it to Delayed Start to avoid issues with too many services starting at once.
Check service dependencies: Ensure that any dependent services are running, as some services cannot start until others are active.
Verify privileges: Services rely on correct account permissions to run. Ensure the service is associated with a valid user account or system account, and check that the password is correct.
Check system files: If a core Windows service is affected, run tools like chkdsk or sfc (System File Checker) to scan and repair system files.
Reinstall application: If an application-specific service is failing, try reinstalling the application that provides the service.
Re-register DLLs: Use regsvr32 to re-register any Dynamic Link Library (DLL) files that the service depends on.
Remove orphaned entries: If a service persists after uninstalling software, it may be an "orphan" entry in the registry or startup folder. Use System Configuration Utility (msconfig) or Registry Editor (regedit) to remove it.
3. Time Drift
Time synchronization is essential for processes like authentication, backups, and system logs. A time drift occurs when the local computer's time is not aligned with the server’s time, potentially leading to issues.
Steps to address time drift:
Check time synchronization: Each PC has a real-time clock (RTC) chip, but it's not reliable for accurate timekeeping. Configure systems to use network-based time sources instead.
Set authoritative time sources: Configure servers and clients to use either GPS-synchronized time sources or a reliable pool of Internet time servers. This ensures that time across the network remains accurate.
Use the same time source: Ensure all clients, including remote ones, are configured to use the same time source as the network servers to avoid discrepancies.
By following these structured steps, you can effectively troubleshoot application and service fault issues, improving overall system stability.
Key Takeaways:
Application crashes can often be resolved by updating, uninstalling, or reinstalling the software. Always prioritize data preservation and check logs for possible causes.
Services not starting may be linked to dependencies, permissions, or corrupt files. Restart services, adjust startup settings, or reinstall the software if necessary.
Time drift can disrupt network services. Ensure that all devices use the same authoritative time source, such as GPS-synced or Internet-based servers, to maintain synchronization.

Summary:
In this lesson, we learned how to troubleshoot common computer problems. For boot issues, we used recovery tools and BIOS settings to fix problems like incorrect device settings or failing hard drives. To address slow startups or desktop loading, we fixed driver or profile issues by rebuilding the profile. Performance problems, such as high CPU/memory usage, were solved by restarting services, rebooting, or upgrading hardware. We also covered how to fix system errors like Blue Screens of Death and instability by running diagnostics and checking system files. USB problems and application crashes were resolved with tools like chkdsk, bootrec, diskpart, and sfc. These steps help fix a variety of system errors. These troubleshooting techniques ensure you can effectively maintain and repair your system for smooth and efficient performance.